Prolost Speedramp
User Guide
Prolost Speedramp makes it easy to create complex speed changes, with smooth transitions and high-quality frame interpolation.
The Short Version
- Import your footage into After Effects and add it to a new composition.
- Make sure the composition frame rate matches your editing frame rate.
- Apply Prolost Speedramp.
- Use Layer Markers to set where your speed changes will occur.
- Use the sliders to set up your speeds and transitions.
- Speed 1 sets the speed from the start of the clip to the first marker.
- Speed 2 sets the speed between marker 1 and 2.
- And so on.
Installing Prolost Speedramp
- Double-click Prolost Speedramp v1.0.zip to expand it, and open the Prolost Speedramp v1.0 folder. Inside, you'll find Prolost Speedramp.ffx.
- Copy Prolost Speedramp.ffx to your User Presets folder. The location of this folder varies with your operating system and your version of After Effects. Locate the User Presets Folder.
- Now launch After Effects, and reveal the Effects & Presets panel. Under User Presets, you should see Prolost Speedramp.
Importing the footage into After Effects
Import your footage into After Effects. It's helpful to ensure that After Effects interprets your footage at the frame rate at which it was shot. For example, you might have 59.94 fps footage from a DSLR, or 120 fps footage from a GoPro or even an iPhone. Select the footage item in the Project Panel and verify that it shows the correct shooting frame rate.
If your footage shows an incorrect frame rate, you can adjust it by choosing File → Interpret Footage → Main. However, the maximum frame rate you can specify here is 99 fps.
Creating the Composition
In the Project Panel, drag your footage to the Create Composition button to create a new comp at the same size and frame rate.
If you started your After Effects project from Premiere Pro using Dynamic Link, begin here.
If the footage frame rate doesn't match your editing frame rate, you should now fix that. Choose Composition → Composition Settings, and set Frame Rate to the correct value for your editorial timeline (usually 29.97, 23.976, or 25 fps).
It's a good idea to turn audio Off for the footage layer now.
If you preview the composition now, you should see your footage playing back in real-time, i.e. events play out in real-world speed. This is true even when the footage frame rate doesn't match the composition frame rate, because After Effects is based on time, not frames.
Apply Prolost Speedramp
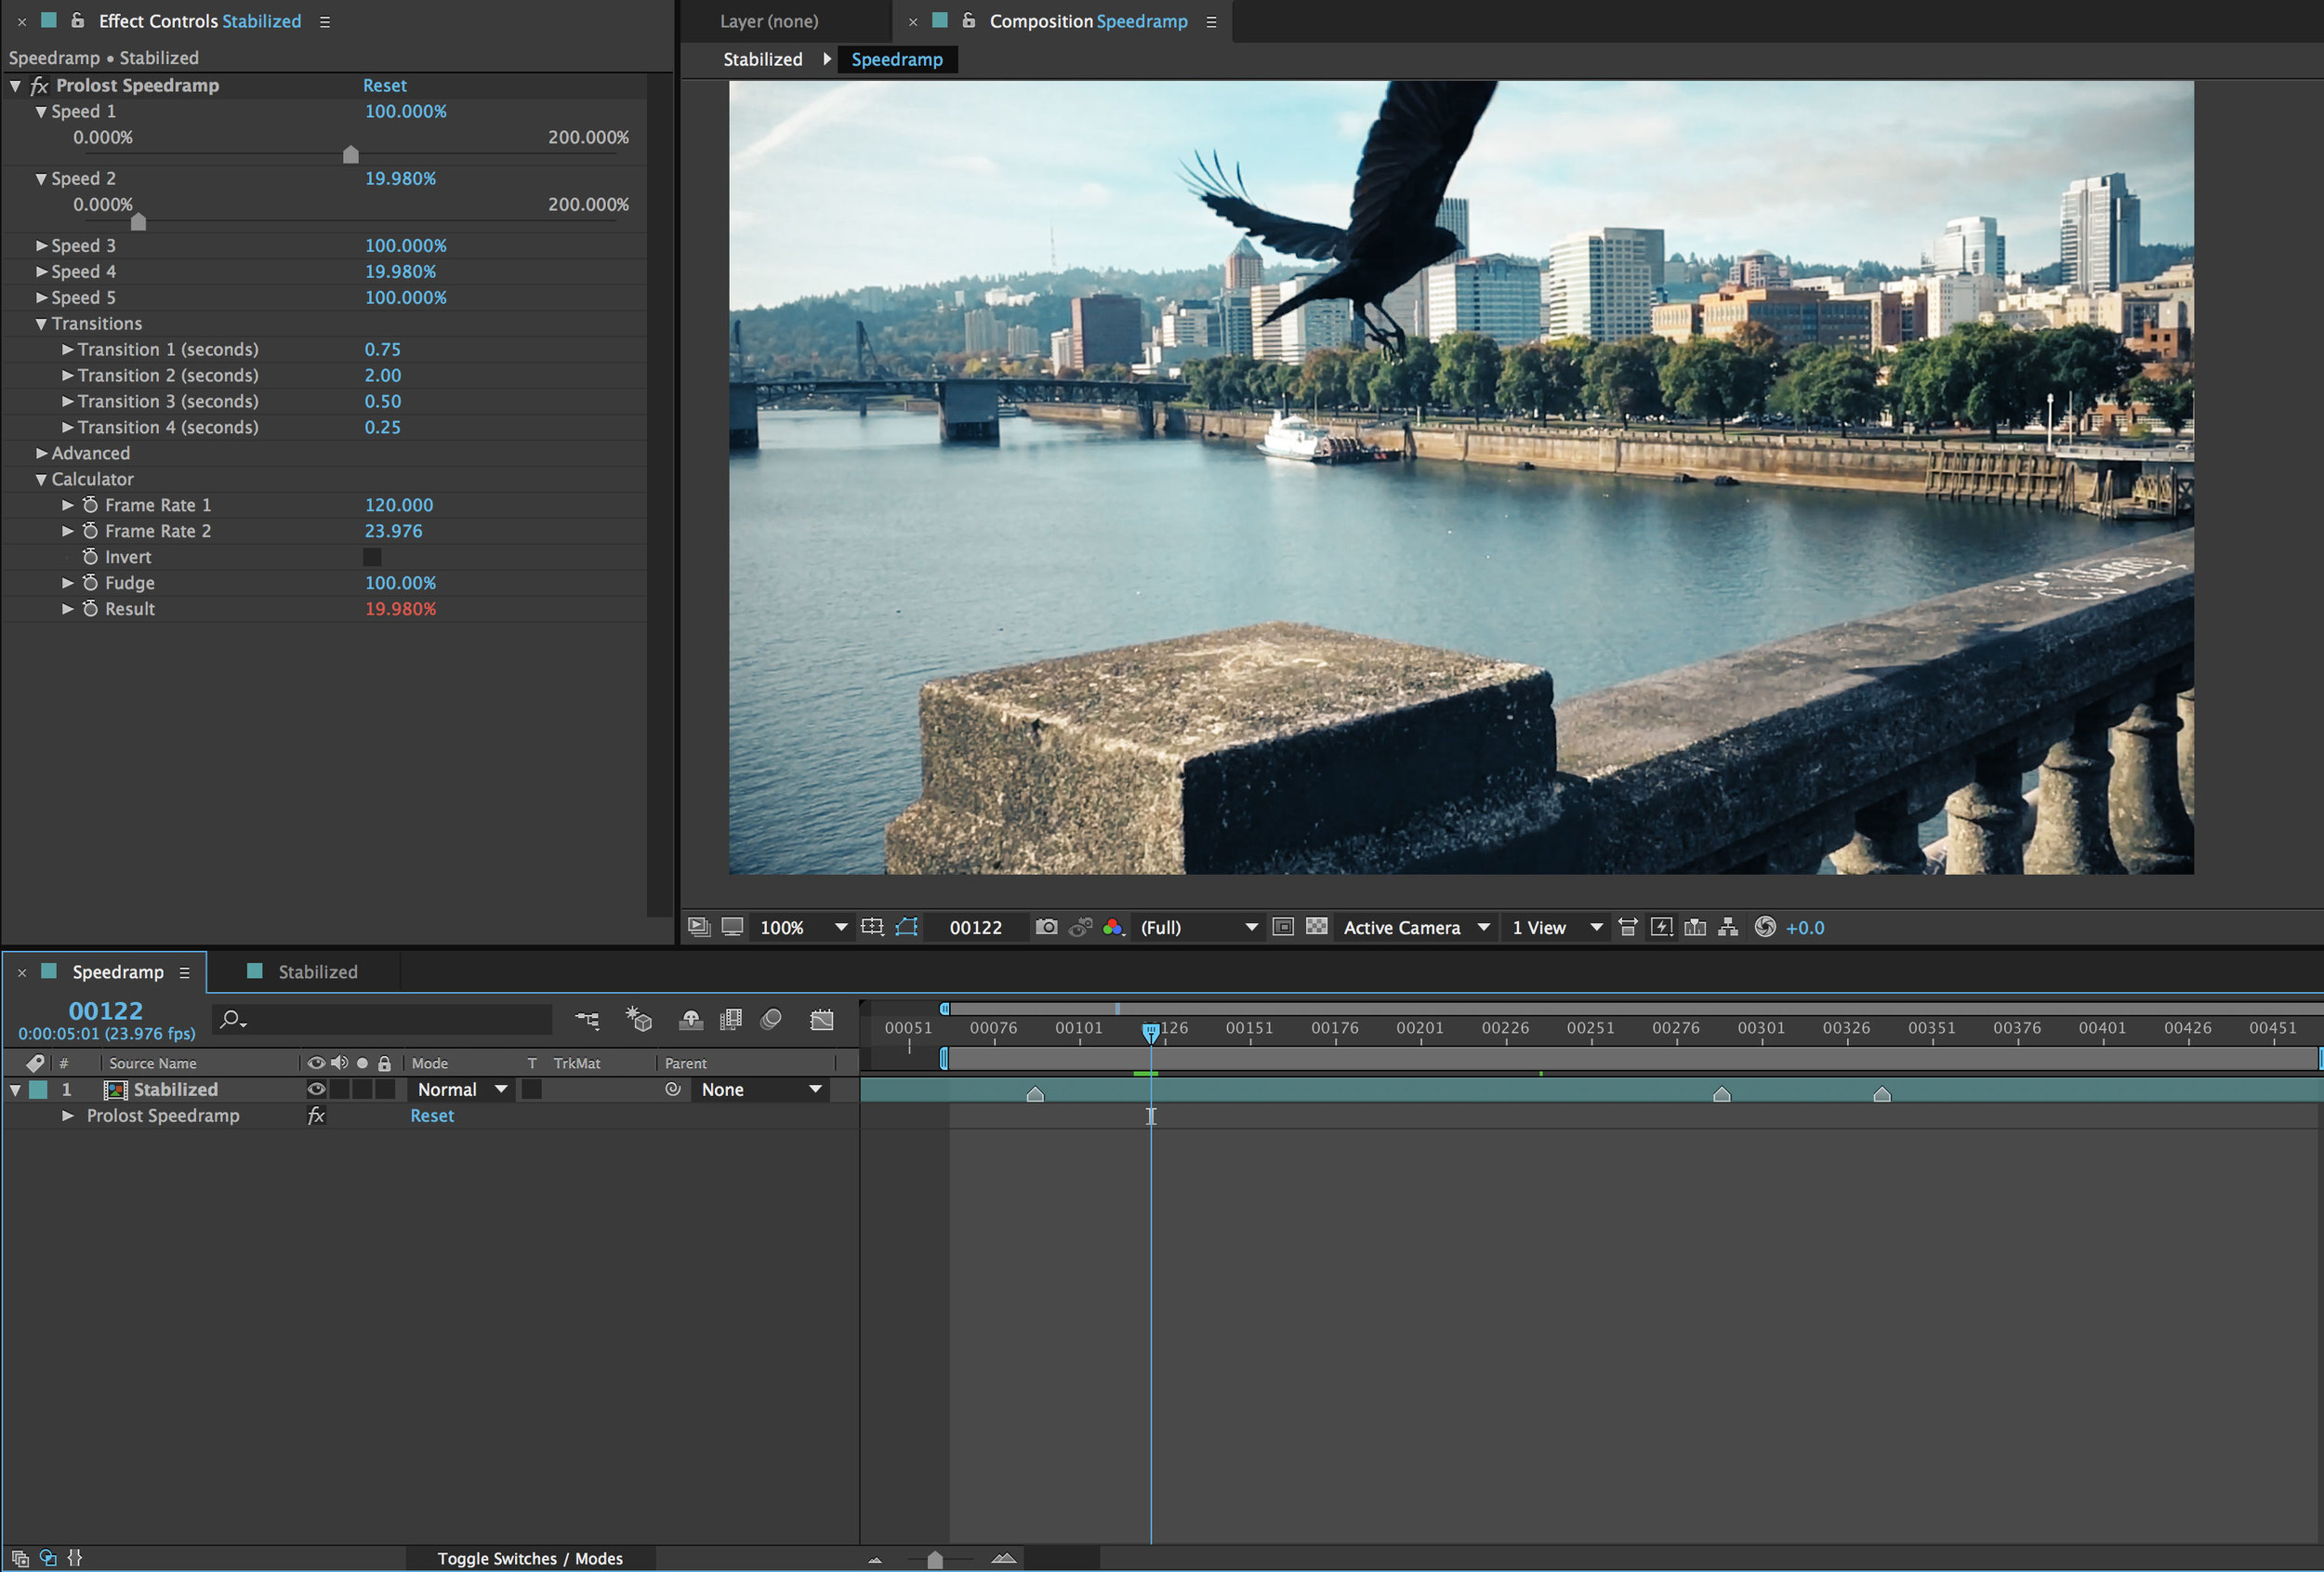
Find Prolost Speedramp in the Effects & Presets panel, and apply it to your layer.
The first thing you'll see is a set of five Speed sliders. This is where you set your speeds, in percentages. 100% is real time, 50% is half speed (slow motion), 200% is double speed (fast motion).
You specify the transition points between speeds using Layer Markers.
Using Layer Markers
Add a Layer Marker to your Footage Layer . You can do this with Layer → Add Marker, or with the * asterisk key on the numeric keypad.
With one Marker placed, you have two speeds. Before the Marker, the footage will play back at the speed specified by the Speed 1 sider. After the Marker, the footage will run at the speed specified by Speed 2.
Transitions
Starting just before the Marker, the speed will smoothly transition from Speed 1 to Speed 2. The duration of this transition is set using the Transition 1 (seconds) slider, found under the Transitions group. Like the slider says, this value is expressed in seconds. The default values are 0.25, or ¼ second.
Adding More Speeds
Prolost Speedramp will recognize up to four Layer Markers, for a total of five speeds. Any Layer Markers after the fourth will be ignored.
Displaying the Speed Graph
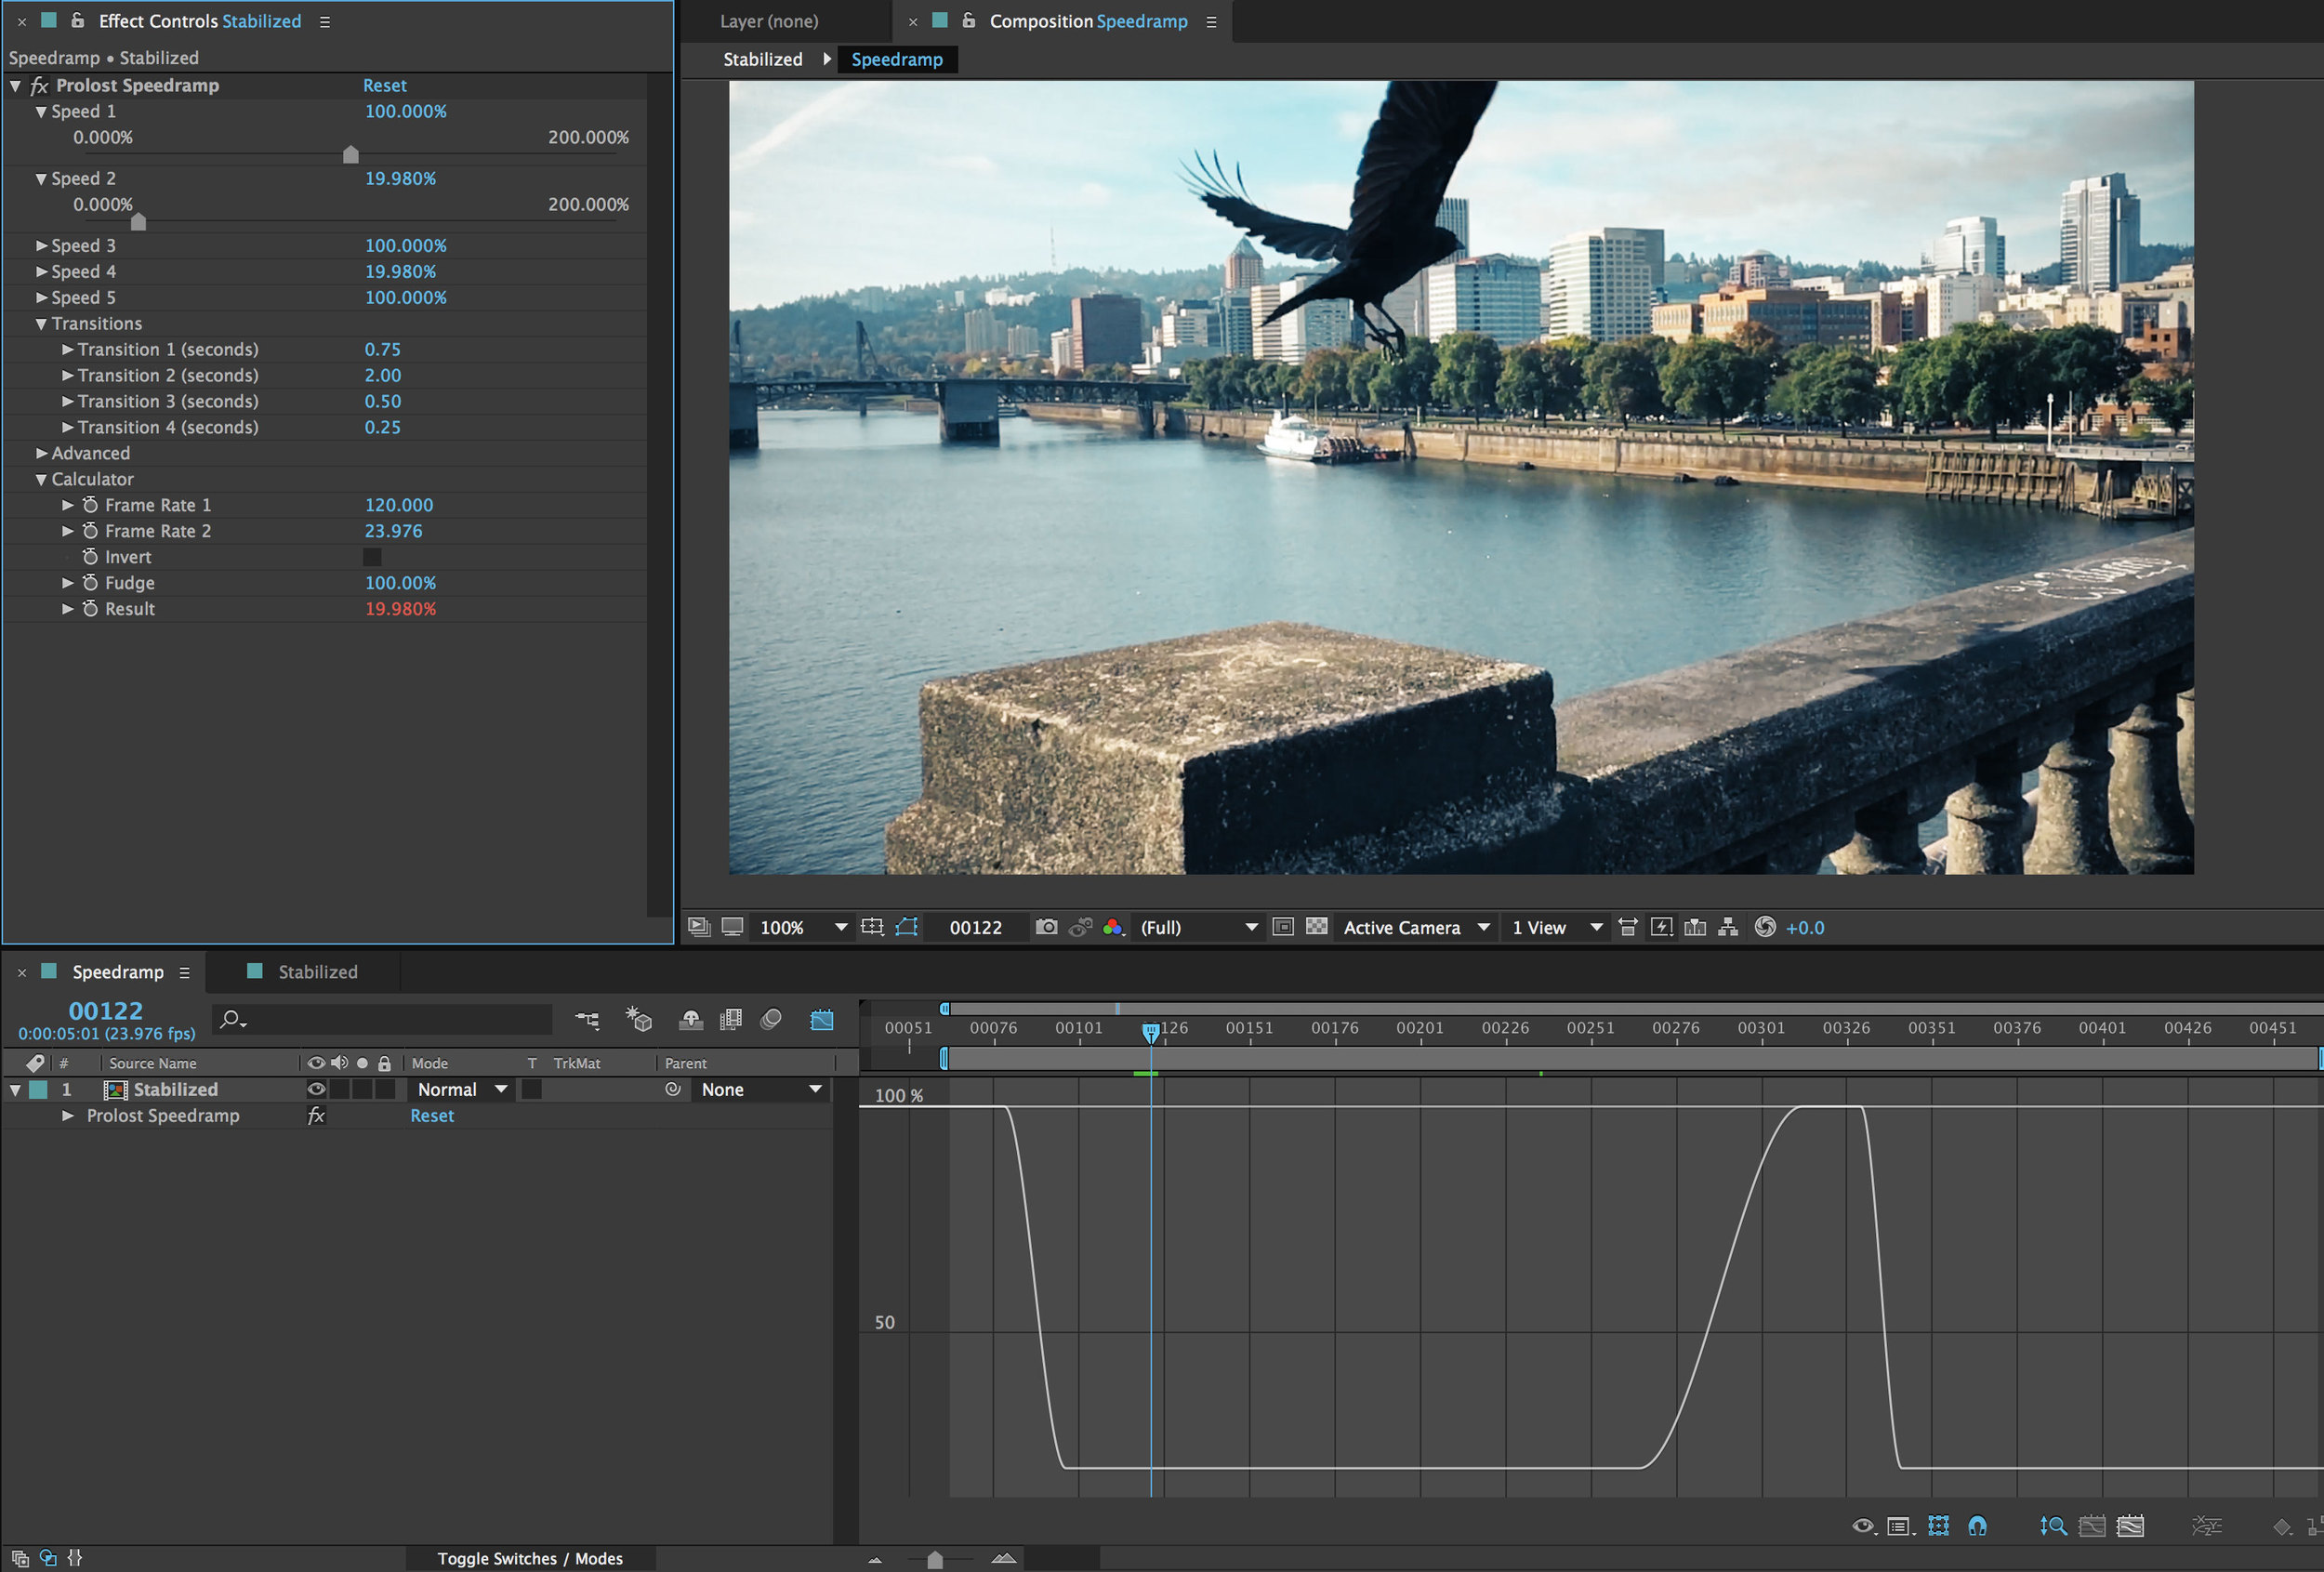
You can visualize the speed graph if you like. This is helpful when designing complex transitions between speeds.
Select the Layer and press EE (press E twice in rapid succession).
Locate the parameter called (Current Speed).
Below that parameter is a line that starts with “Expression.” To the right of that, you should see a highlighted equals sign =, and then a small icon that looks like a squiggly graph. This is the Show Post-Expression Graph button. Toggle it On.
Reveal the Graph Editor by clicking the Graph Editor button in the Timeline panel (or press Shift + F3).
You should now see the values for (Current Speed) graphed in the timeline.
The bummer, of course, is that you can’t see the Layer Markers in the Graph Editor view, so you’ll probably mostly want to stick to the Layer view.
Fine Tuning
Even though Prolost Speedramp is a pretty awesome way to design speed ramps, they're still a hard thing to do well. Be prepared to work at it a bit. Changing speed values will cause you to have to move markers, and possibly vise versa. But the good news is, Prolost Speedramp allows you to iterate on the speed ramp effect much easier than any other method I’ve ever used.
The Calculator
The Calculator section doesn’t change anything about your footage. It just gives you an easy place to do simple frame-rate math. You can see the speed difference between any two frame rates you enter, and you can modify the result by a percentage with the Fudge slider.